
Comprehensive Maintenance Guide for Jarvis Pneumatic and PAS Stunners
- Jarvis Canada

- May 19, 2025
- 15 min read
Daily Maintenance—Your First Line of Defense
A quick clean and check at the end of every shift is the cheapest insurance you’ll ever buy for your stunners. Bleeding off air or pulling the blank, wiping away blood and powder, inspecting seals, adding a drop of oil, and firing a test shot take minutes, yet they do wonders: they keep bolt velocity on target, stop little leaks before they become major failures, cut the odds of painful misfires to near zero, and show CFIA you’re serious about preventive control. Equipment that gets this daily TLC runs smoother, lasts longer, and costs less to own—plain and simple. In the next sections we’ll lay out the exact daily routine for both our pneumatic USSS guns and PAS cartridge models, so you can lock in those benefits every single day.
Table of Contents
Periodic Deep Cleaning & Maintenance
Daily wipe-downs keep your stunner in the game, but they don’t catch every chip of carbon or hairline spring fatigue. That’s where scheduled, deeper maintenance steps in. Think of it like a 10 000 km oil change for your pickup: skip it once and you might get away with it, skip it twice and the engine starts to tell on you.
Weekly Touch-Up
If you’re stunning all day, every day, give the pistol a thorough once-over at the end of the week. Strip it farther than you do in daily cleaning, right down to the firing block and bumper stack. Look for soot caked in the firing pin channel, check that the bolt’s buffers haven’t started to mushroom, and feel every spring for crisp tension. Swap anything that feels tired—springs and rubber bumpers cost pennies compared with an hour of downtime on Monday morning.
Monthly Rebuild
Heavy users should block out time each month for a “mini rebuild.” Replace wear parts on schedule instead of waiting for them to fail: a fresh firing pin, brand-new return and sear springs, a complete buffer kit. Use the manual’s parts diagram, keep the old pieces in a bag for reference, and log the swap in your maintenance book. Those records prove to CFIA that your preventive control plan isn’t just words on paper—it’s real work you do on real dates.
Professional Servicing
When you need more than routine TLC, Jarvis has your back with factory-level expertise. Sending a stunner in for an annual refurbishment means our technicians strip it to the frame, replace every wear part, check bolt velocity with calibrated gear, and return it tuned to factory spec. Turnaround is quick—often within a week—so your spare gun barely warms the bench, and the primary stunner comes back feeling crisp, hitting hard, and ready for another year of dependable service.
Manufacturer Support
Keeping a stunner healthy between overhauls is just as easy. Jarvis Canada stocks the full menu of spare parts and consumables—from O-ring kits and piston seals to firing pins, springs, buffers, and color-coded cartridges—in country for fast shipping. Order a starter kit with your new gun, top up before busy season, or call us when something surprises you; odds are the part leaves our shelf the same day. Quick access to genuine components means less downtime, proven reliability, and no guessing whether an off-brand seal will fit. Partner with us and you’ll have both the parts and the people you need to keep every Jarvis stunner running strong.

Daily Maintenance Essentials
Before we dive into wrenches and cleaning brushes, let’s lock down the basics that keep everyone safe and the stunner in one piece.
General Safety Precautions
Unload or Depressurize First: Every maintenance task starts the same way: make the tool harmless. For a PAS cartridge stunner, open the breech, remove any blank, and double-check the chamber is empty. For a USSS pneumatic unit, shut off the air supply, pop the quick-connect, and squeeze the triggers once to vent leftover pressure. Until you do, treat the stunner like it’s live.
Wear Your PPE, Every Time: We get it—gloves and goggles can feel clunky. Wear them anyway.
Eye protection guards against solvent splashes and small springs that leap free.
Cut-resistant or nitrile gloves keep blood, oils, and sharp edges off your hands.
Ear protection matters if you dry-fire or test-fire indoors; one sudden blast can ring for days. Slide them on before you pick up a tool, not halfway through the job.
Work in a Clean, Well-Lit Space: Set up a small bench or cart away from the processing line. Good lighting helps you spot cracks in an O-ring or carbon on a firing pin, and a tidy surface keeps tiny parts from rolling into a floor drain.
Follow the Manual, Not Your Memory: Jarvis manuals include torque values, lube points, and “do not oil” warnings. Keep the book open beside you. If something feels forced, stop and check the diagram—don’t muscle it.
By building these safety habits into your daily routine, you protect coworkers and the expensive equipment that keeps the line moving. The cleaning steps that follow take only a few minutes, and they only work when everyone starts from a safe, controlled setup.
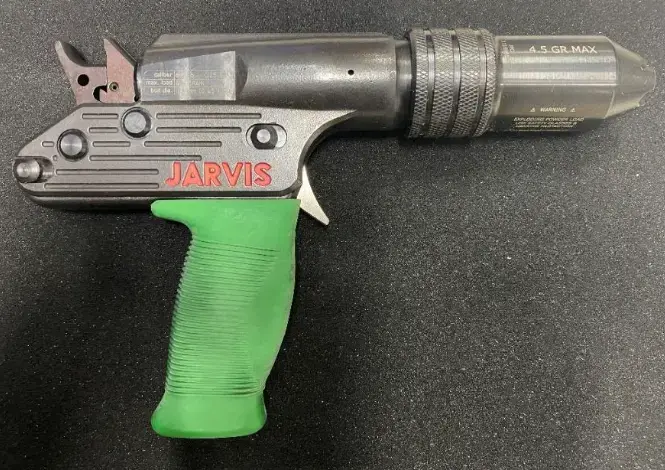
Type P(Pistol) Cartridge Stunners (Jarvis PAS Series)
Daily Maintenance Step-by-Step
1. Remove the Nose Piece
Unscrew the nose piece by hand and set it aside.
2. Extract the Bolt and Bumpers
Slide out the bolt and all bumpers.
Wipe each part with a dry cloth.
3. Inspect and Rotate Bumpers
Check all nine bumpers for wear.
Rotate the bumpers regularly to ensure even wear.
Move the two end bumpers into the middle—these absorb the most impact.
Replace any worn bumpers immediately.
The stunner must contain nine bumpers, one lower blue washer, and one upper orange washer.
Never operate with fewer bumpers—this can bend the bolt and result in an incomplete stun.
4. Clean the Nose Piece and Breech
Use a wire brush to clean the nose piece.
Place a dry cloth over the scraper, insert it into the breech, and twist to clean thoroughly.
Use the loop-handled scraper to reach and clean the lower breech chamber—guide it to the bottom and twist.
5. Clear the Exhaust Port
Use a pin or a paper clip to clear the exhaust port.
Shine a flashlight through the shell opening; light should pass through freely.
6. Lightly Oil the Breech Interior
Apply a very thin coat of gun oil inside the breech.
Wipe off any excess oil.
Do not oil the bumpers.
7. Reassemble
Slide the bolt, washers, and bumpers back into the stunner in the same order they were removed.
8. Re-install the Nose Piece
Apply anti-seize compound to the male threads on the breech.
Reattach the nose piece by hand—do not overtighten.
9. Prepare for Storage
Leave the block and hammer forward toward the shell to relieve spring tension.
10. Store properly
Place the stunner in its case.
Store it in a dry, room-temperature location
Ready to see the full routine in action? Watch the step-by-step video below where our lead tech tears down a Type P PAS stunner, swaps all the wear parts, and puts it back together for another month of flawless service.
Type C(Cylinder) Cartridge Stunners (Jarvis PAS Series)
Daily Maintenance Step-by-Step
1. Disassemble the Stunner
Rotate the firing cap to SAFE, remove it, and split the tool into two pieces.
Withdraw the penetrating rod, buffers/bumper sleeves, and locking O-ring. Lay parts out in removal order.
2. Clean & Inspect the Barrel / Breech
Clamp-Retained (“Free-Flight”) Tools
Brush the bore: Push a dry rag through; use a steel or brass brush with light gun oil only if heavy residue remains.
Inspect for cracks or ovaling: Check the retaining-pin windows and interior bore for hairline fractures or elongation.
Verify the retention system:
Drive out the cross-pin, remove the retention spring, collar ball, collar, and locking O-ring.
Replace any damaged component, then reinstall all four parts and re-pin the barrel.
Retractable (Automatic Bolt Return) Tools
Brush the bore: Same procedure as above, paying special attention to the exhaust port—clear it with a pin until light passes through.
Inspect for damage: Look for cracks around the seating ledge and exhaust-port area.
Service bumper sleeves:
Confirm eight sleeves are present.
Rotate the two end sleeves (they take the hardest impact) into the middle to even out wear.
Replace any sleeve that is split, hollowed, or loose.
3. Service the Buffers / Sleeves
Clamp-Retained:
Two black buffers with one red buffer in the middle. Wipe dry only—no oil.
Replace any buffer showing splits, cracks, or missing material (you may replace a single piece).
Retractable:
Eight soft bumper sleeves, plus two stop washers and one flange washer.
Wipe dry; discard damaged sleeves.
Always reinstall all eight sleeves, the flange washer at the base, and the two stop washers on top—running short risks bolt damage and poor stuns.
4. Clean & Inspect the Penetrating Rod
Scrub the piston end and shaft with a green Scotch-Brite® pad to remove powder and rust.
Check for straightness and hairline cracks.
Ensure the tip’s inside edge is sharp (do not grind or file it).
Pick out debris inside the ⅝-inch-deep hollow tip.
5. Check the Firing-Cap Assembly
Safety rotation: Must stop firmly after a ¼-turn in safe or fire.
Locking collar: Should fit tight; replace if it slides or shows cuts.
Firing pin & spring: Press the pin—travel should be smooth and spring strong.
Trigger & ledges: Replace parts if edges are rounded or worn.
6. Lightly Lubricate Critical Areas
Apply a thin film of gun oil to the breech interior and firing-pin bushing.
Do not oil buffers, bumper sleeves, or the bolt tip.
7. Reassemble in Correct Order
Clamp-Retained: black buffer → red buffer → black buffer → locking O-ring → rod → breech (hand-tight).
Retractable: flange washer → eight sleeves (rotated) → two stop washers → rod → locking O-ring → breech (hand-tight).
Join barrel/breech to firing-cap, seat the locking collar, and store the tool uncocked and unloaded, split into two pieces.
8. Functional Safety Checks
Shake Test (Clamp-Retained): With no cartridge, shake the assembled tool 2–3 times. If the rod drops, remove the stunner from service.
Safety-cap test: Confirm smooth safe ↔ fire rotation and firing-pin lockout.
9. Final Storage
Wipe the exterior dry and store the tool in its case, in a clean, dry, room-temperature area.
Keep breech and firing-cap separated to eliminate doubt about live cartridges.
Record maintenance completion in the daily log.
Ready to see the full routine in action? Watch the step-by-step video below where our lead tech tears down a Type C PAS stunner, swaps all the wear parts, and puts it back together for another month of flawless service.
Jarvis USS-21 / USS-22A Pneumatic Stunners
Daily Maintenance Step-by-Step
1. Depressurize and lock-out
Shut off the plant airline and bleed residual pressure.
Disconnect the quick-coupler from the stunner.
Tag the airline “LOCKED OUT – DO NOT USE.”
2. Remove the nose section
Secure the tool on a bench or in a padded vise.
Crack the four M10 nose bolts with a torque wrench, then finish by hand.
Tap the nose evenly with a rubber mallet; it only fits one way. Set it aside.
3. Extract the rod and bumpers
Apply a short burst of air to Port B to unlatch the catch.
Pull the rod assembly straight out.
Slide off the two urethane bumpers (open face to open face) and wipe all parts clean with a lint-free cloth.
4. Inspect and rotate bumpers
Look for surface wear on bumper faces.
Move the two end bumpers into the middle; they absorb the hardest impact.
Replace any bumper showing cracks, splits, mushrooming, or excessive flattening.
Confirm the stack order: rod → bumper (open face) → bumper (open face).
Never operate with missing or damaged bumpers—this can bend the rod and cause incomplete stuns.
5. Clean internal passages
Brush carbon from the nose and liner; wipe them dry.
Blow compressed air through Ports C and B to clear the catch housing passages.
Remove the main-valve exhaust plate and muffler; shake out debris and replace the muffler if clogged.
Verify the handle spool valve slides freely; add one drop of pneumatic oil to the spool only.
Lightly grease the pivot lip of the catches; ensure they pivot smoothly inside the retainer.
6. Check seals and catches
Inspect the large cup seal on the catch piston—cup faces up toward the catches.
Confirm the two nose O-rings and the three main-valve-body O-rings are intact, lubricated, and seated in their square grooves.
Verify all five catches carry matching batch numbers; if any catch shows rounded gripping edges, replace the entire set.
7. Apply light lubrication
Rod, piston skirt, and cup seal: coat sparingly with ISO-32 pneumatic oil.
Bumpers: do not oil.
External threads and nose bolts: use light oil or anti-seize; avoid Loctite® to prevent thread buildup.
8. Reassemble
Slide the rod and bumpers back in with the open faces toward each other.
Seat the catch cylinder; install the nine M6 screws finger-tight, then torque to ≈ 14 N·m (10 ft-lb).
Mount the main valve body with its upper and lower M5 bolts; torque to spec.
Fit the handle mount, ensuring its three O-rings seal the passages; secure the bolts.
Re-attach the nose section, tapping it home if necessary; torque the four M10 bolts to ≈ 68 N·m (50 ft-lb).
Pulse air into Port C and listen for a “click” indicating the catches are open.
9. Functional air-only check
Reconnect the airline.
Depress the main handle—air should flow to the nose only while the handle is held.
Depress the head contact—rod must extend smoothly and retract instantly.
Listen and feel for air leaks around the nose, handle mount, and quick-exhaust valve.
10. Prepare for storage
Leave the rod fully retracted with the catches latched.
Wipe the exterior dry and oil the liner mouth lightly.
Store the stunner in its case, in a dry, room-temperature location.
Ready to see the full routine in action? Watch the step-by-step video below where our lead tech tears down a Jarvis USSS-21, swaps all the wear parts, and puts it back together for another month of flawless service.
Troubleshooting – Cartridge Stunners (PAS)
Problem: Misfire (no discharge) when trigger is pulled
Probable Causes: You might be dealing with a faulty blank cartridge (a dud or one exposed to moisture). The firing pin may not be striking properly due to being worn, broken, or jammed with debris. Another possibility is that the safety isn't fully disengaged.
Solutions: Keep the tool pressed against the animal’s head for 30 seconds in case of a delayed fire. Then, carefully remove the cartridge and try a fresh one. If you get repeated misfires, let’s inspect the firing pin. If the tip is rounded or chipped, it won’t reliably ignite primers—you’ll need to replace it. Make sure to clean out the firing pin channel too; powder residue can cushion the blow. Confirm that the hammer and trigger mechanism is functioning properly—broken springs could be to blame. Lastly, ensure you're storing your cartridges correctly to prevent duds. Damp ammunition has been linked to failed stuns.
Problem: Partial fire / low power shot (muffled sound and weak effect)
Probable Causes: This could be due to an underpowered cartridge, improper seating, heavy fouling in the barrel, use of the wrong (too light) cartridge, or carbon buildup slowing the bolt.
Solutions: Eject and discard the weak cartridge. Let’s clean the barrel and chamber thoroughly—unburned powder or grime affects how the blank detonates. Double-check that you’re using the correct cartridge power level for the animal in question. If your device supports multiple power settings, ensure it's set up correctly. Don’t forget to inspect the bolt vent holes (if present); they must be clear.
Problem: Bolt stuck in the animal’s skull
Probable Causes: This usually happens when the bolt fails to retract, often due to a broken return spring, or if the bolt’s design snags due to barbing or mushrooming at the tip.
Solutions: If the bolt sticks during stunning, you’ll need to carefully extract it. This often means bracing and twisting it out—make absolutely sure the animal is insensible first. Afterward, examine the bolt tip: if it’s burred or damaged, file it smooth or replace it. Check and possibly replace the return spring if it’s weak. For future use, let’s aim for a more central and thinner part of the skull; sticking tends to happen more in exceptionally thick areas or with over-penetration.
Problem: Difficulty opening breech or extracting spent cartridges
Probable Causes: The chamber may be dirty, causing the cartridges to stick. You could also have a swollen case from high pressure or a faulty ejector mechanism.
Solutions: Let’s start by cleaning the chamber thoroughly with a brush. Apply a light coat of oil, then wipe to leave only a film. If a case is stuck, use a wooden dowel to gently push it out from the muzzle end—after removing the bolt and disassembling the device. Also, inspect the ejector mechanism (if equipped)—it might be broken or gummed up. Replace or clean it as needed.
Problem: Frequent need for second stun (ineffective stunning)
Probable Causes: This is often due to poor aim, underpowered cartridges, or mechanical issues like a worn bolt that no longer reaches the brain.
Solutions: We should revisit proper aiming techniques—operator error is the easiest issue to correct. If the cartridges you’re using are borderline in strength, switch to a stronger one, as long as your device is rated for it (for example, the Jarvis .25R PAS Type P supports cartridges up to 4.5 grain. Inspect the bolt length—grinding, sharpening, or wear can shorten it over time. If it’s too short, it won’t penetrate deeply enough, and you should replace it. Also, check the muzzle end for deformation. Some stunners use a disposable muzzle bushing—replace it if worn to maintain the correct bolt projection distance.

Troubleshooting – Pneumatic Stunners (USSS)
Problem: Stunner fails to fire (no bolt release when triggers are pressed)
Probable Causes: You may be facing clogged or stuck valves—either the trigger valve or main valve—which can prevent proper pressurization. Other culprits could be an insufficient air supply, a disconnected hose, or improper engagement of the safety interlock (dual trigger).
Solutions: Let’s start by verifying that your air pressure and supply are adequate. Clean the trigger and main valve components—if these are clogged with dirt or oil, air won’t flow properly to launch the bolt. Make sure you're fully depressing both triggers. Also, confirm that the handle valve is functioning. One tip from Jarvis: remove the hose going to the catch and press the muzzle—if no air flows, the handle valve might be blocked. Clean or replace any faulty valve parts as needed.
Problem: Delayed firing (you press the triggers, but there’s a lag before the bolt fires)
Probable Causes: This usually happens when the air passages are partially blocked by debris—such as clots inside the nose or tubing. A sticky or sluggish catch-release mechanism could also be to blame, especially if dried blood has built up.
Solutions: You’ll want to thoroughly clean the nose housing air passages and tubes. Jarvis recommends blowing compressed air through the nose and the small tubes leading to the catch release to clear any blockages. Take apart the nose and remove any tissue, bone fragments, or other obstructions around the stunning rod and guide. After cleaning, lubricate the moving parts. Also, check the seals on the catch release piston—if they’re worn or damaged, they could cause pressure to release too early or too late.
Problem: Low impact / Weak stun (bolt fires but doesn’t penetrate effectively)
Probable Causes: This could be caused by low air pressure, leaking seals that let air bypass the piston, or friction from a bent bolt or poorly lubricated piston.
Solutions: Check the compressor and regulator to ensure you’re running at the correct PSI. Listen closely for any continuous air leaks—if you hear one, it’s likely that an O-ring (especially around the cylinder liner) is failing and causing pressure loss. Replace and lubricate those O-rings. Also, make sure the bolt is moving freely: if it’s bent or the guide is damaged, you’ll need to repair or replace those parts. Always keep the tool well-lubricated so the piston can operate at full force without friction.
Problem: Bolt not retracting after firing (remains stuck out)
Probable Causes: The return spring or internal buffers may be broken, or the bolt might be heavily fouled. Other causes include loss of air pressure on the return stroke or a mechanical jam.
Solutions: Disconnect the air supply and manually try to push or pull the bolt back (with the tool locked out). If it won’t move, disassemble the nose to check for mechanical jams. Replace any broken buffers or springs that assist with retraction. Also clean the cylinder thoroughly—sometimes small fragments of bone can jam it. Once maintenance is complete, test fire the tool in a safe area to make sure it retracts as it should.
Problem: Constant air leak from stunner (hissing sound)
Probable Causes: This is typically caused by worn piston or valve O-rings, or by dirt stuck in a valve seat.
Solutions: First, pinpoint where the leak is coming from—for example, air leaking from around the trigger usually means a trigger valve leak, while air from the exhaust points to the main valve. Replace the O-rings in the leaking area and clean the affected valve. Jarvis notes that when air leaks past the main piston liner O-ring, it can travel through a check valve and hold the main valve open, resulting in constant leakage. Replacing those O-rings should stop the leak and restore proper pressurization.
Wrap-Up: The Bottom Line
Treating maintenance as an everyday habit—rather than a scramble after something breaks—pays off in three big ways: reliability, safety, and savings. A clean, well-oiled stunner fires on the first pull, keeps animals calm, and shields your team from the chaos of failed shots. It also stretches the life of every seal, spring, and bolt, trimming repair bills and keeping surprise downtime off the schedule. In other words, a few minutes with a brush and a logbook today can save you hours of headaches and thousands of dollars tomorrow.
So make preventive care part of your plant’s rhythm. Post a checklist, stock spare parts, schedule deep cleans, and log every test shot. If you need help getting that routine off the ground—or you’d rather let the pros handle a yearly overhaul—reach out to Jarvis Canada. We can supply the parts, walk your crew through a training session, or bring your equipment back to factory-fresh condition in our shop. Let’s work together to keep every stun fast, safe, and CFIA-ready.
Join Our Newsletter and Follow Us on Facebook
Stay connected with Jarvis Canada! Subscribe to our bi-weekly newsletter to keep up-to-date with exclusive sales, special promotions, and insightful blogs on industry trends and Jarvis innovations. Also, be sure to follow us on Facebook for frequent updates on exciting deals, promotions, new blogs, and opportunities to win fantastic free prizes!
About Jarvis Canada
Jarvis Canada Ltd
4650 112th Ave. S.E.
Calgary, Alberta, T2C 2K2
Phone: (403) 236-5350
Email: info@jarviscanada.com
Notice: All trademarks and brand names belong to their respective owners. Use of these names does not imply any connection or endorsement.
This content and other digital marketing for Jarvis Canada is Dream Powered.


Comments